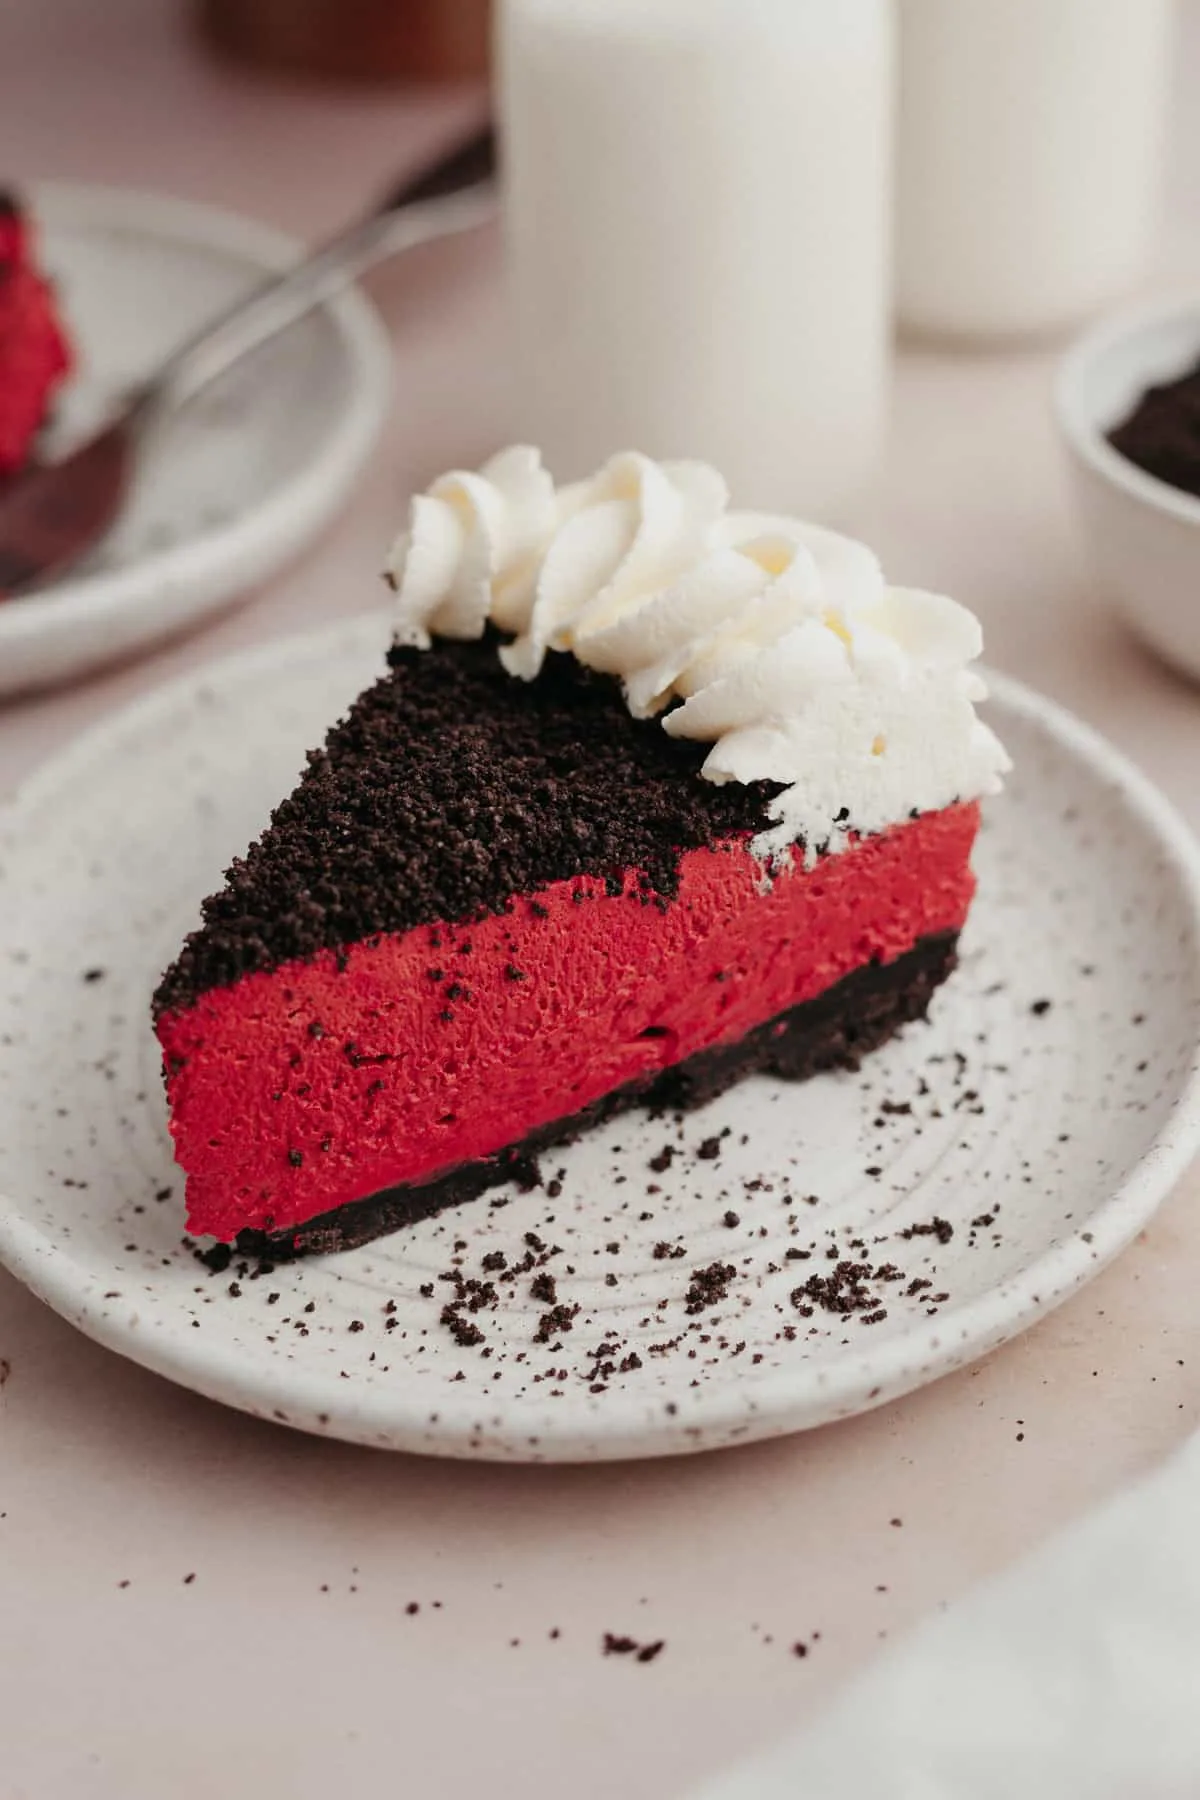
Red Velvet Oreo Cheesecake
Red Velvet Oreo Cheesecake is a rich, creamy no-bake dessert that combines the classic flavor of red velvet cake with the irresistible crunch of Oreo cookies. Featuring a buttery Oreo crust, silky cocoa-infused cheesecake filling, and fluffy whipped cream topping, this decadent dessert delivers bakery-style elegance with surprisingly simple preparation.
Why You’ll Love This Recipe
- No-Bake Simplicity – No oven required, making it perfect for stress-free entertaining
- Creamy and Decadent Texture – The whipped cream folded into the filling creates an airy yet rich cheesecake
- Classic Red Velvet Flavor – Cocoa, vanilla, and cream cheese combine for the signature red velvet taste
- Crunchy Oreo Contrast – Oreo crust and topping add texture against the smooth filling
- Make-Ahead Friendly – Chilling overnight makes this perfect for preparing in advance
- Show-Stopping Presentation – Vibrant red filling and piped whipped cream create a bakery-quality dessert
Ingredients You’ll Need
For the Oreo Crust
- 2 cups Oreo cookies, crushed – Creates a chocolatey, crunchy crust base
- 1 stick unsalted butter, melted – Binds the crumbs together and adds richness
For the Cheesecake Filling
- 2 cups heavy cream, cold – Whipped into stiff peaks for a light, mousse-like texture
- 16 oz cream cheese, room temperature – Provides the rich and creamy cheesecake base
- 1/4 cup sour cream, room temperature – Adds tanginess and smooth texture
- 2 teaspoons vanilla extract – Enhances the chocolate and cream cheese flavors
- 1 cup confectioners’ sugar, sifted – Sweetens the filling while keeping it smooth
- 3 tablespoons cocoa powder – Adds the subtle chocolate flavor essential to red velvet desserts
- Red food dye – Gives the cheesecake its signature vibrant red color
For the Topping
- 6 Oreos, crushed – Adds crunch and decorative contrast
- 1 cup heavy cream, cold – Whipped for the decorative topping
- 1/4 cup sugar – Sweetens the whipped cream topping
Step-by-Step Instructions
Prepare the Oreo Crust
In a large mixing bowl, combine the crushed Oreo cookies and melted butter. Stir thoroughly until all crumbs are evenly moistened.
Press the Crust Into the Pan
Transfer the crumb mixture into a 9-inch springform pan. Press firmly into an even layer along the bottom and slightly up the sides using the bottom of a measuring cup.
Chill the Crust
Place the crust in the freezer for 20 minutes to help it firm up before adding the filling.
Whip the Heavy Cream
Using a stand mixer or hand mixer with a whisk attachment, beat the cold heavy cream until stiff peaks form, about 5 minutes. Set aside.
Prepare the Cheesecake Base
In a separate bowl, beat the room-temperature cream cheese until completely smooth and free of lumps.
Add Flavorings and Color
Mix in the confectioners’ sugar, vanilla extract, cocoa powder, sour cream, and red food dye. Beat until smooth, creamy, and evenly colored.
Fold in the Whipped Cream
Using a rubber spatula, gently fold the whipped cream into the cheesecake mixture until fully combined while maintaining the airy texture.
Fill the Crust
Pour the cheesecake filling into the chilled Oreo crust and smooth the surface with an offset spatula or spoon.
Chill Overnight
Cover the cheesecake tightly with plastic wrap and refrigerate for at least 12 hours to fully set.
Prepare the Topping
Before serving, whip the heavy cream and sugar together until stiff peaks form. Pipe or spoon the whipped cream around the cheesecake edges.
Finish and Serve
Sprinkle crushed Oreos over the top and carefully remove the springform pan before slicing and serving.
Recipe Notes & Tips
- Use Room Temperature Cream Cheese – Prevents lumps and creates a smoother filling
- Whip Cream to Stiff Peaks – Helps stabilize the no-bake cheesecake structure
- Do Not Overmix After Folding – Maintains the light and fluffy texture
- Chill Overnight for Best Results – Allows the filling to fully firm up
- Freshly Crushed Oreos Work Best – Creates better texture than pre-packaged crumbs
- Use Gel Food Coloring – Produces vibrant color without thinning the filling
Nutritional Information
- Prep Time: 15 minutes
- Chill Time: 12 hours
- Total Time: 12 hours 15 minutes
- Servings: 12 slices
- Calories: Approximately 584 kcal per slice estimate

Perfect Pairings
- Fresh Strawberries or Raspberries – Bright fruit balances the rich cheesecake
- Hot Coffee or Espresso – Cuts through the sweetness beautifully
- Chocolate Drizzle – Adds extra indulgence for chocolate lovers
- Vanilla Ice Cream – Complements the creamy red velvet flavor
Ideal Occasions
- Holiday Dessert Tables – Eye-catching and festive presentation
- Birthday Celebrations – Perfect for red velvet lovers
- Dinner Parties – Elegant make-ahead dessert option
- Valentine’s Day Treats – Vibrant red color makes it especially fitting
Storage & Serving Tips
- Keep Refrigerated – Store covered in the refrigerator for up to 5 days
- Serve Chilled – Best texture and flavor straight from the fridge
- Slice with a Warm Knife – Creates cleaner cheesecake slices
- Avoid Freezing – The texture may become grainy after thawing
Creative Variations to Try
- Chocolate Ganache Topping – Drizzle ganache over the finished cheesecake
- Mini Cheesecake Cups – Prepare in jars or cupcake liners for individual servings
- White Chocolate Red Velvet Version – Add melted white chocolate to the filling
- Extra Oreo Crunch – Mix chopped Oreos directly into the cheesecake filling
Troubleshooting Common Issues
- Cheesecake Too Soft – It likely needs additional chilling time
- Lumpy Filling – Cream cheese may not have been fully softened
- Crust Falling Apart – Add slightly more melted butter to bind crumbs better
- Whipped Cream Deflating – Avoid overfolding into the cheesecake mixture
Why This Recipe Works
This recipe works because whipped heavy cream provides structure and lightness to the no-bake cheesecake while cream cheese supplies richness and stability. Folding whipped cream into the filling creates a mousse-like texture that remains airy while still slicing cleanly after chilling overnight. The Oreo crust adds both structure and crunch, balancing the smooth filling perfectly. Cocoa powder gives subtle chocolate depth without overpowering the classic red velvet profile, while sour cream introduces slight tanginess that keeps the dessert from becoming overly sweet. Chilling the cheesecake for an extended period allows the fats within the cream cheese and whipped cream to fully firm up, resulting in a stable yet creamy dessert. Each slice contains approximately 584 calories, making it a decadent dessert best enjoyed as an indulgent treat.
Final Thoughts
Red Velvet Oreo Cheesecake is a luxurious no-bake dessert that combines bold visual appeal with rich, creamy flavor and irresistible Oreo crunch. It is simple enough for home bakers yet elegant enough for special occasions, making it a dependable crowd-pleaser for holidays, birthdays, and celebrations. The recipe’s make-ahead convenience and customizable toppings make it especially practical for entertaining. For a lighter variation, reduced-fat cream cheese and lighter whipped topping can be substituted while still preserving the signature creamy red velvet flavor that makes this cheesecake so memorable.